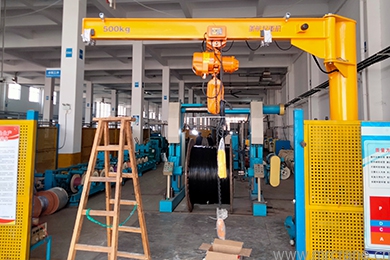
How to install a cantilever crane, with instructions for installing and using the cantilever crane attached
(270 degree rotation)
nine hundred
1. & Nbsp& Nbsp; Foundation fabrication of rotary arm crane
1.1& Nbsp; Placement of foundation embedded parts (as shown in Figure 1)
1.1.1; Connect the embedded bolts and the base plate as shown in the figure. The threads of the embedded bolts on the base plate or the upper part of the ground should be ensured to be 75mm~80mm, and the upper and lower nuts should be tightened.
1.1.2. Place the assembled foundation embedded parts into the pit according to the construction drawing and fix them properly, with one extended embedded bolt serving as a grounding pile.
1.2 Pouring of Pit Concrete
1.2.1; Place the power supply pipe approximately 150mm above the ground as shown in the figure (with an inner diameter sufficient to pass through the power supply line).
1.2.2. Pour concrete with a strength of no less than C20 (note that the height should be approximately 65mm lower than the ground, and the exposed threads of the concrete must be kept clean).
1.2.3; After 3 weeks of concrete maintenance, the rotary arm crane can be installed, and the final secondary grouting should be consistent with the ground leveling.
nine hundred and one
&Nbsp;
2. Installation of rotary arm crane column (as shown in Figure 2, for rotary arm cranes with foundation embedded parts)
2.1. Lift the column vertically, align the bottom plate holes with the foundation bolts, and gently lower it.
2.2. Fix the column base plate with washer 4, spring washer 3, and nut 2.
2.3. Gently tighten nut 2.
2.4. Use a horizontal ruler to measure whether the column is perpendicular to the ground, and at the same time, measure whether the upper plane of the upper arm support 1 of the column is horizontal. If it is not horizontal, adjust the height of the foundation nut 5 of nut 2 to keep it horizontal.
2.5. Use a torque wrench to tighten the nut.
2.6. Torque M20:210 N· m. M24:320 N· m. M27:450 N· M
2.7. M30:600 N· m. M36:1000 N· M
Attention:
When adjusting the level, do not unscrew the nut 2, only loosen it, otherwise there is a risk of the column tipping over.
nine hundred and two
3. Installation of swing arm crane column (as shown in Figure 3, for swing arm cranes with large floors)
3.1 Installation of large base plate for rotary arm crane foundation
3.1.1. Place the large base plate in position and adjust the level on the concrete floor where the rotary arm crane needs to be installed. (The strength of the ground concrete shall not be less than C20, and the thickness shall not be less than 200mm.)
3.1.2. Use an impact drill to drill holes in the surrounding holes of the large base plate on the concrete to install the anchor bolts. The drilling parameters are shown in the following chart.
3.1.3. Secure the large base plate with a 5-inch anchor bolt.
nine hundred and three
&Nbsp;
Product name, model, drilling hole diameter (mm), bolt length (mm), hole depth (mm), maximumThe other end is first fixed to the end of the C-shaped track with a fixed end clamp 10, and then threaded into the column. The entrance is fixed with a cable fixing 11. Connect the lower end of the cable to the main switch inside the column.
&Nbsp; nine hundred and seven
8. Installation of main switch
8.1; The main switch is installed in the column hole, connecting the input cable and output cable.
8.2; The 0 bit (OFF bit) indicates cutting off the power supply. 1 bit (ON bit) indicates that the power is turned on.
*Precautions:
Ensure that all joints are secure.
Ensure that the junction head cannot come into contact with the column wall, otherwise there is a risk of electric shock.
9. Installation of electric
hoist9.1. Adjust the sequence of shims to adjust the distance between the flanges of the electric
hoist wheels, so that it is greater than the width of the H-shaped steel by 1-3 mm.
9.2. Hang the electric
hoist wheel (with the front end of the rotating arm facing the column).
9.3. Connect the cable terminal to the electric
hoist according to the diagram.
10. Installation of the walking wheel collision block (as shown in Figure 8)
nine hundred and eight
11. Use of rotary arm crane
11.1. The rotary arm crane must be effectively grounded.
11.2. It is strictly prohibited to stand under the rotating arm when lifting objects to prevent danger.
11.3. After using the rotary arm crane for a period of time, all fastening bolts must be carefully checked for looseness, especially the foundation bolts and the clamping bolts of the wall arm crane. If there is looseness, it should be tightened before use.
11.4. The operation of the electric
hoist must strictly follow its operating manual, and the lifting chain or lifting wire rope must be regularly lubricated with chain or wire rope oil to extend the service life of the chain rope.
11.5. It is strictly prohibited to lift objects that exceed the range of the rotating arm. They must be moved within the range of the rotating arm before lifting.
11.6. Overloading lifting is strictly prohibited.
11.7. Regular safety inspections must be conducted on the equipment (a comprehensive inspection should be conducted once a year, and fasteners and safety devices should be inspected every six months) to ensure the safe use of the product.
&Nbsp;

nine thousand and ten

